 Targets
Creating Targets
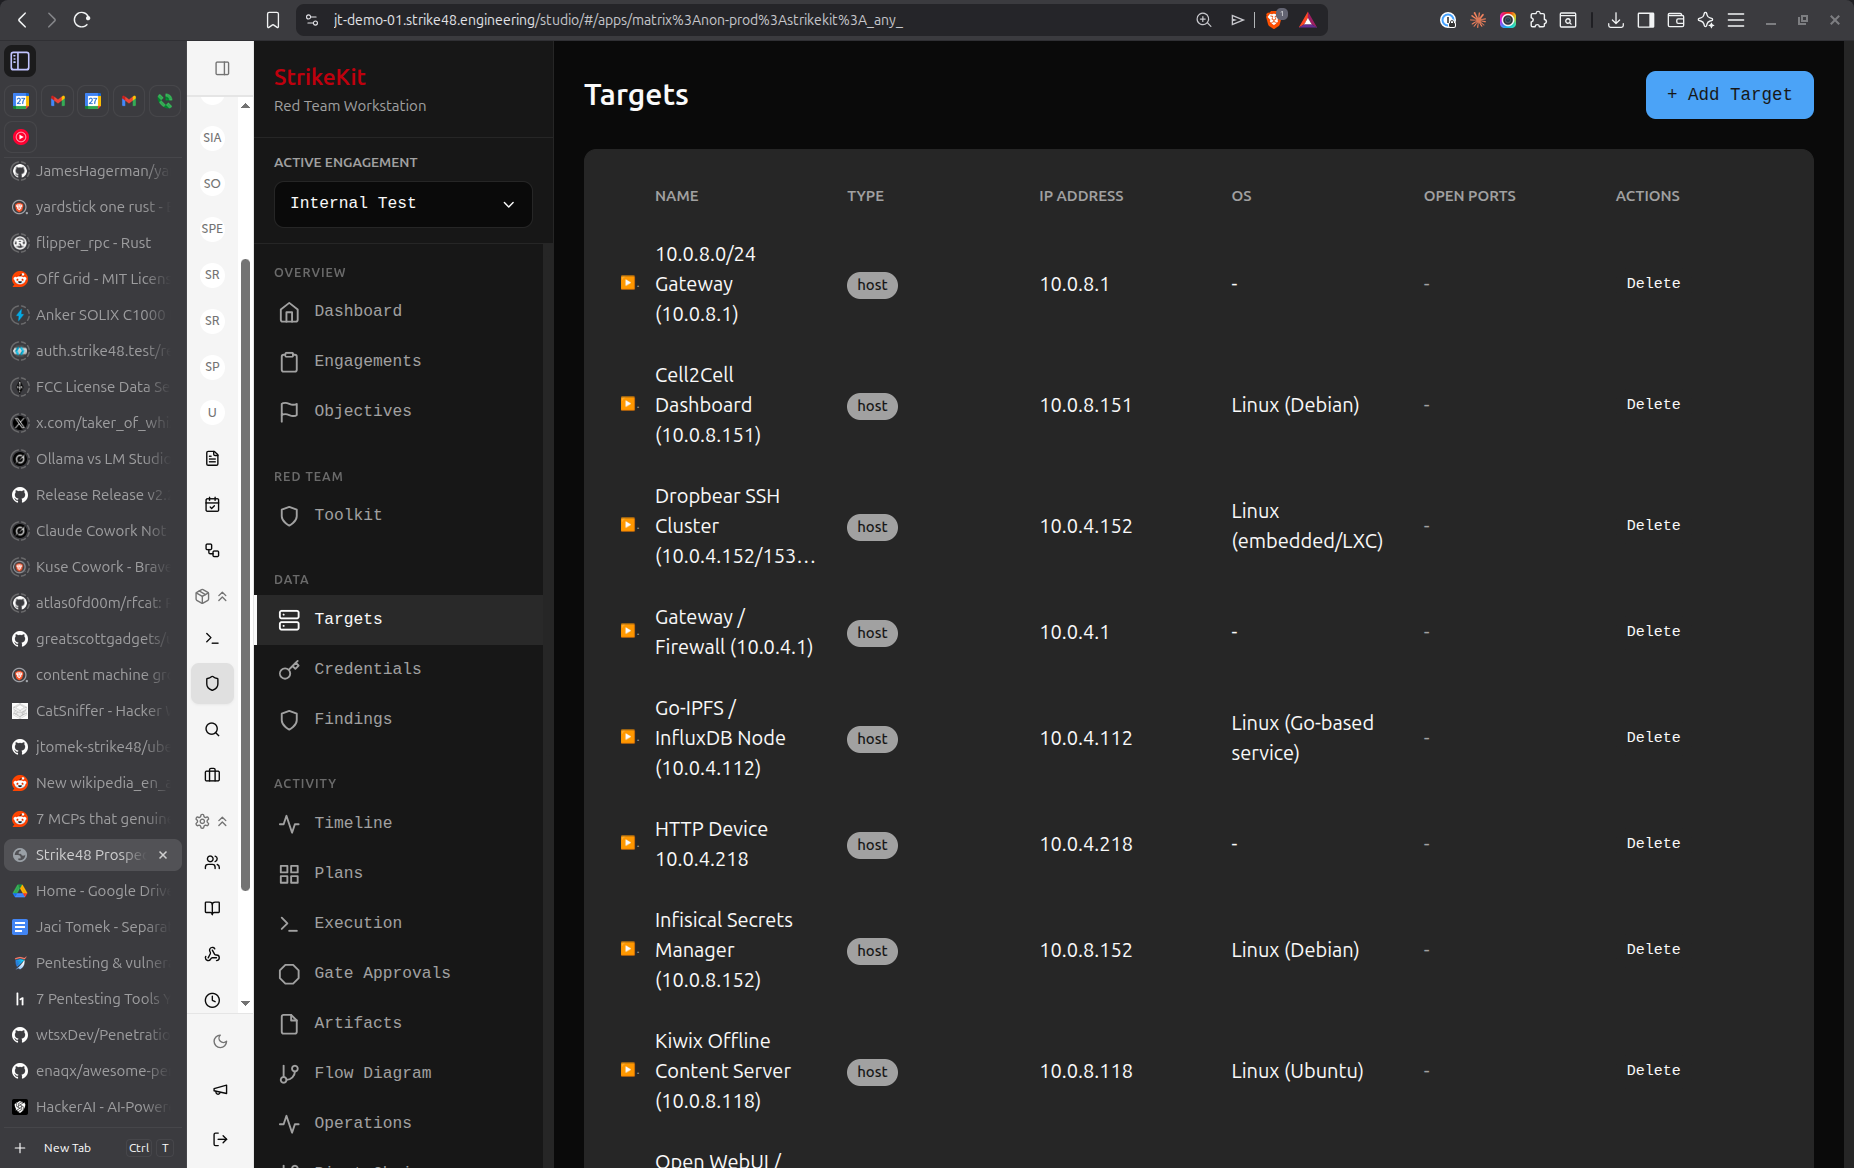 Target management with service tracking and compromise status
- Navigate to Intelligence → Targets
- Click Create Target
- Fill in target details
Target Types
Host
Individual system or device:
- IP Address: IPv4 or IPv6 address (e.g.,
192.168.1.100) - Hostname: DNS name (e.g.,
webserver01.example.com) - OS: Operating system (Windows, Linux, macOS, etc.)
- Status: Discovered, Compromised, In Progress
Network
Network range or subnet:
- CIDR: Network notation (e.g.,
10.0.0.0/24) - Description: Purpose or location
- Gateway: Default gateway IP
Service
Running service on a host:
- Parent Host: Which target hosts this service
- Port: TCP/UDP port number
- Protocol: HTTP, HTTPS, SSH, SMB, etc.
- Version: Service version or banner
- Status: Open, Filtered, Closed
Target Information
Required Fields
IP Address or Hostname: Primary identifier
Examples:
- 192.168.1.100
- webserver.example.com
- 2001:db8::1
Type: Host, Network, or Service
Optional Fields
Operating System:
- Windows Server 2019
- Ubuntu 22.04 LTS
- macOS Sonoma 14.2
- Unknown (if not yet identified)
Description: Notes about the target
Examples:
- "Primary web server for client portal"
- "Domain controller for CORP domain"
- "Development database server"
Tags: Categorize targets
Examples:
- critical
- domain-controller
- web-server
- database
- dev-environment
Status:
- Discovered: Found but not yet accessed
- In Progress: Currently working on compromise
- Compromised: Successfully gained access
- Out of Scope: Identified but outside engagement scope
Auto-Population
Targets are automatically created from:
Reconnaissance Module
- Network scanning results
- DNS enumeration
- Service discovery
- OSINT collection
C2 Commands
ipconfig/ifconfigoutputnslookup/digresultsnet viewoutputarp -ascanning
Manual Import
- Paste list of IPs or hostnames
- Import from CSV file
- Copy from reconnaissance tools
Target Details View
Click on a target to view:
Overview
- Basic information (IP, hostname, OS)
- Current status
- Discovery date
- Last updated
Services
List of running services:
- Port and protocol
- Service version
- Banner information
- Known vulnerabilities
Credentials
Associated credentials:
- Username/password pairs
- Hashes
- API keys
- SSH keys
Findings
Related vulnerabilities:
- Findings affecting this target
- Severity breakdown
- Remediation status
Activities
Related activities:
- Reconnaissance performed
- Exploitation attempts
- Post-exploitation activities
- Timestamps and details
Notes
Target-specific notes:
- Technical observations
- Access paths
- Configuration details
- Special considerations
Marking Targets as Compromised
When you gain access to a target:
- Open target details
- Change Status to Compromised
- Document:
- How access was gained
- Credential used
- Current privileges
- Persistence mechanisms
Compromised targets appear with distinct visual indicators in:
- Target list
- Network Topology view
- Pivot Chain visualization
Linking Targets
To Credentials
Associate discovered credentials:
- In target details, click Add Credential
- Select credential from list or create new
- Credential appears on target page
- Target appears on credential page
To Findings
Link vulnerabilities to affected targets:
- When creating finding, select Affected Targets
- Choose one or more targets
- Finding appears in target's findings list
- Remediation can be tracked per-target
To Pivot Chains
Show lateral movement paths:
- Create pivot chain in Mission → Pivot Chains
- Add targets as nodes in the chain
- Visualize compromise progression
- Track how you moved through network
Target Organization
By Status
Filter targets by status:
- Show only compromised targets
- Show targets in progress
- Hide out-of-scope targets
By Type
Filter by target type:
- Hosts only
- Networks only
- Services only
By Tags
Use tags for organization:
critical- High-value targetsdomain-controller- AD infrastructureweb-app- Web applicationsdatabase- Database serversworkstation- User endpoints
Search
Search by:
- IP address
- Hostname
- Description
- Tags
- Operating system
Network Topology
Targets appear in Analysis → Network Topology:
Map View
Visual representation showing:
- Target locations
- Connections between targets
- Compromise status (color-coded)
- Service information
Pivot Visualization
Shows attack progression:
- Initial access point
- Lateral movement path
- Current position
- Compromised targets highlighted
Best Practices
Target Naming
Use consistent conventions:
Good:
- webserver01.corp.local
- 192.168.1.100 (Web Server)
- DC01 (Domain Controller)

Avoid:
- server
- 192.168.1.100
- target1
Status Updates
Keep status current:
- Update to "In Progress" when actively working
- Update to "Compromised" immediately after access
- Document compromise method in notes
Service Documentation
For each discovered service, record:
- Port number and protocol
- Service version
- Banner information
- Known vulnerabilities (link to CVEs)
Credential Tracking
Link all credentials to targets:
- Where credential was found
- Which targets it works on
- Privilege level granted
- Whether credential provides unique access
Out of Scope Handling
When discovering out-of-scope targets:
- Mark as "Out of Scope" immediately
- Document in notes
- Do NOT attempt access
- Create blocker if needs client clarification
- Notify client if sensitive
Import/Export
Import Targets
Import from common formats:
CSV Format:
ip,hostname,os,type,description
192.168.1.100,web01.corp.local,Ubuntu 22.04,host,Primary web server
192.168.1.101,db01.corp.local,Windows Server 2019,host,SQL Server
10.0.0.0/24,,,network,Internal network
Nmap XML:
- Import nmap scan results
- Auto-creates hosts and services
- Includes OS detection and service versions
Text List:
192.168.1.100
192.168.1.101
10.0.0.0/24
webserver.example.com
Export Targets
Export for:
- Backup and archival
- Sharing with team
- Integration with other tools
- Report generation
Export formats:
- CSV (spreadsheet compatibility)
- JSON (programmatic access)
- Markdown (documentation)
Common Workflows
Initial Reconnaissance
- Run network scan from Toolkit → Reconnaissance
- Review discovered targets in Intelligence → Targets
- Add manual targets from OSINT
- Tag by priority (critical, high-value, etc.)
- Review and mark any out-of-scope targets
Active Exploitation
- Select target from list
- Review services and known vulnerabilities
- Attempt exploitation
- If successful, mark as "Compromised"
- Document access method in notes
- Link credentials used
- Create finding for vulnerability exploited
Lateral Movement
- From compromised target, enumerate internal network
- Discover new targets via C2 commands
- New targets auto-populate list
- Prioritize based on objectives
- Attempt lateral movement
- Create pivot chain showing progression
- Update network topology
Pre-Report Review
- Filter by "Compromised" status
- Verify all have:
- Clear description
- Linked credentials
- Related findings
- Compromise method documented
- Generate network topology diagram
- Include in report's attack path section
Tips
- Document immediately: Add targets as you discover them
- Use descriptive names: Make it easy to identify targets months later
- Tag consistently: Use the same tag names across engagements
- Link credentials: Always associate credentials with targets
- Update status: Keep compromise status current for accurate reporting
- Service enumeration: Document all discovered services, not just exploitable ones
- Out-of-scope caution: Mark immediately to avoid accidental access
- Network grouping: Use CIDR notation for network ranges
- Screenshots: Capture evidence of compromise for findings
- Pivot tracking: Document how you moved between targets
Troubleshooting
Duplicate Targets
If reconnaissance creates duplicates:
- Review target list for duplicates (same IP, different hostname)
- Merge information manually
- Delete duplicate entries
- Update any linked items (credentials, findings)
Service Not Detected
If service isn't auto-populated:
- Manually create service entry
- Link to parent host
- Add service details (port, protocol, version)
- Check reconnaissance configuration
Missing OS Information
To identify operating system:
- Run OS fingerprinting scan
- Check service banners for hints
- Use TTL values (64=Linux, 128=Windows)
- Manual inspection after compromise
Related Features
- Network Topology - Visualize targets and connections
- Credentials - Associate credentials with targets
- Findings - Link vulnerabilities to targets
- Pivot Chains - Track lateral movement
- C2 - Auto-populate from C2 commands
- Reconnaissance - Auto-discover targets
Next Steps
After adding targets:
- Test Credentials - Verify credentials against targets
- Document Findings - Record vulnerabilities on targets
- Collect Evidence - Gather proof from target systems
- Track Lateral Movement - Use targets for pivoting
- Visualize Network - See targets in network map
Related Documentation:
- C2 Operations - Auto-populate targets from C2
- Reconnaissance - Discover targets
- Kill Chain - Target progression through attack phases
Video Tutorial
📹 Coming Soon: Target management and organization best practices
Quick Demo
🎬 GIF: Adding a target manually 🎬 GIF: Marking target as compromised